Showing posts with label Happy Mail. Show all posts

Thursday, 13 July 2017

Snail Mail Envelope Flipbook


So I've gone and got me a Youtube channel! I know, right? So instead of awkwardly showing you by picture how to create a certain project - or awkwardly describe it, because let's face it, I'm probably pretty damn bad at it... I can show you! I managed to find the courage, pull my finger out and create my channel. Okay so it's not got many subbies at the moment but I hope to inspire as many people as I can!

So that being said, I'm not going to post all of the videos i have so far in a blog post - because to be honest I just didn't think to do that...I should've done...I know...I suck...but what is done is done and I'll post my videos from now on! (So she says! perhaps I shouldn't make promises when I've had a glass of Weston's vintage cider. You have to like cider down here in the West Country. It's the law. or they kick you out!)

Anyhoo...let's get onto the creative stuff shall we...before I get too shlozzled!


So I created a snail mail envelope flipbook! This one is different to the other's I've created because it's more of a deconstructed envelope. I was planning to keep it open but when I closed the flaps down I saw such great potential! 


I love this theme. I created it by using digital papers - which I love to use as I can print them out as many times as I want and not worry about ruining them and have an endless supply (well...as long as I have the paper and the ink!).


 Please feel free to pay a visit to my channel! And if you're lovely please feel free to comment, subscribe and show a little love! 


Happy crafting, lovelies!!


Much love!


Dannii xoxo

Sunday, 6 March 2016

On My Craft Table - Snail mail envelope flipbook


So I've been on bit of a roll recently making a lot of creative snail mail. I absolutely love making things like this and can't wait to send them on their merry way to all my lovely pallies! 

It's made from envelopes from a letter set by Paperchase. The collection it is from is called Hello Sweetie. It's super cute, with pastel colours perfect for spring/summer.(I have to admit, I'm ready for a bit of Spring and Summer now! I'm bored of all this cold weather! Roll on Summer!!)

This one is particular is more for those pen-pals who you just can't shut up to in your letter! It gives plenty of for a lovely, long letter in one pocket and then the other two can be used for goodies or a mail tag.  

I used 3 envelopes from the set and stuck them down with scor tape (since that is the best tape I have at present - the tape runner at the moment is failing dreadfully!).


Rather than stick down side by side with washi tape I stuck the envelope's flap on the other envelope, giving it better stability. I also alternated the way round I stuck them down so that it looked more accordion-like.


I then punched a hole of the front and set an eyelet with my Crop-A-Dile. I plan to use this for the closure. 

On the edges stuck down some washi tape to prevent the sides getting ripped and worn.

Then I decorated the crap out of it!!


I used a selection of project life cards, the washi tapes from the Hello Sweetie collection and a selection of different stickers, enamel dots and die-cuts I had in my stash. I wanted to keep it looking pretty simple.

I made a different version of this using the same collection but instead of using the letter set I used the treat bags. 


This one is pretty easy to make. Just stick together with washi tape. I stuck a notecard inside, again from Paperchase.


Wednesday, 11 February 2015

On My Craft Table - Snail Mail Folder

Snail Mail Folder

I've had a rather crafty couple of weeks! Woot woot! 

So I've (finally) sent some snail mail that was loooong overdue. (she sent in September...I know, I know...I really suck the ducks...)


I like to do colour themes with my snail mail. This time I went with mint and pink. I love those colours together!


Letter using project life grid cards, patterned paper and washi tape.


On the inside I stuck down a small envelope to put the 'mail tag' answers in.

 I used actual tags for the mail tag answers! 


These are all the bits I used -

♥ Mint and kraft pack from boheme circus
♥ Digital Patterned paper from Etsy.
♥ Mint coloured patterned paper from Glitz designs 'carpe diem' collection
♥ Alpha stickers
♥ Washi tape


So to make them is really easy. 

You just get a piece of 12"12 paper, fold it up to reach a length the you like and is suited to your letter to create two pockets.


Stick the sides down (I used a tape runner) 


I also used a corner punch on the edges because I like the rounded look but you don't have to.

Then fold it over.

Then you decorate the crap out of it!!! 

I decorate I layered patterned papers, washi tape and a paper dollie.

To make a little closure I used my crop-a-dile to punch a hole and insert an eyelet and threaded through a mint coloured ribbon.


Easy!!!


Wednesday, 31 December 2014

On My Craft Table - Handmade Envelope Flipbook

Handmade Envie Book

♥♥♥

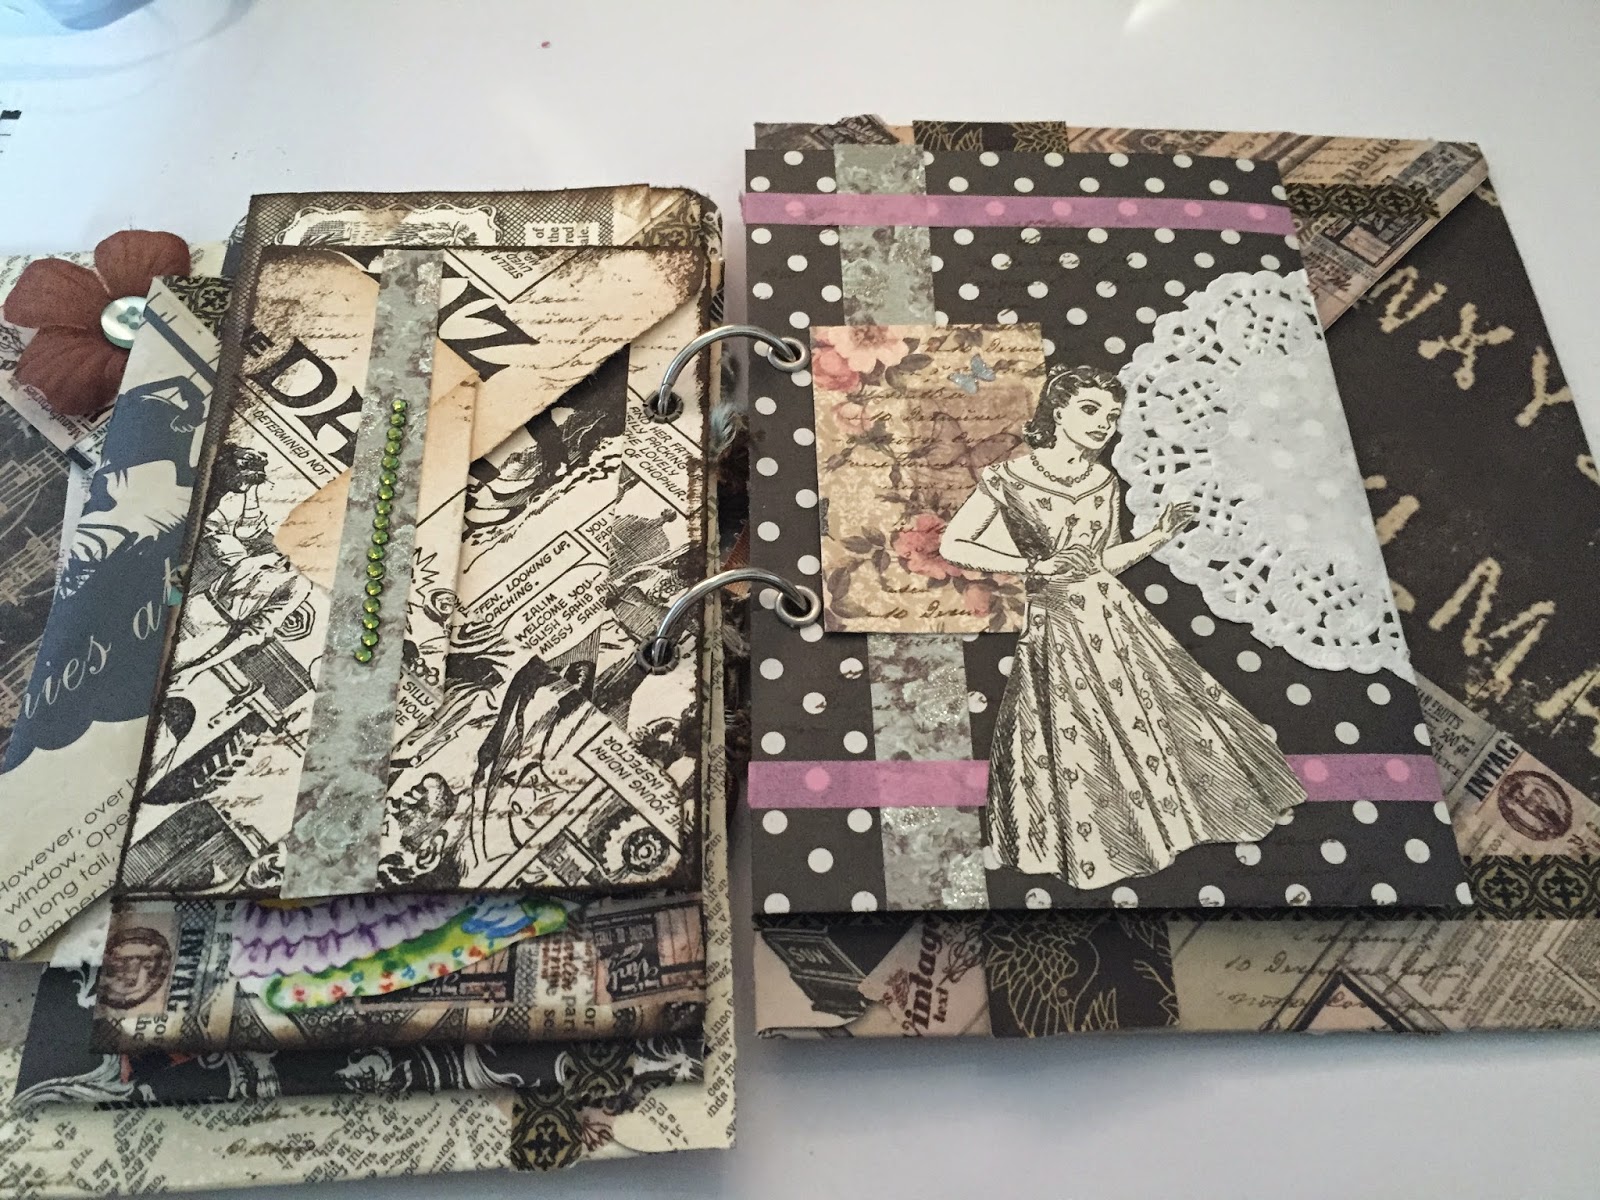
So I thought I would do a tutorial on how to do one of these handmade envelope books. They were for a swap I was part of on Swap-Bot and I just love making them!

The idea is to decorate them and then stuff them with goodies for your recipient. I for one love to spoilt my swap partners! So I tend to make them pretty big!


So lets get to it shall we?

♥♥♥♥♥♥♥

I usually make my own envelopes from ephemera or scrapbook paper. In this particular one mostly used scrapbooking paper although I did make the smaller ‘pocket’ like pages from vintage ephemera as they fitted the theme nicely.


To make the envelopes I used the We R memory keepers envelope punch board. For making envelopes I totally recommend this! It’s so easy to use. If I can do, it anyone can!


After sticking the envelope together, (as I aimed to spolit my partner and stuff these envies like crazy I added washi tape to further secure the sides. It’s probably not needed but I like to for the interest as well), I took out my Crop-a-dile (another good tool to have in your crafty arsenal) and punched 2 holes for the books rings.


I more or less ‘eye-balled’ it but I did measure the holes from the side so they at least were in line with each other. With the other envies I placed the first envelope over the next envelope and drew or dotted inside the holes.


 I’m not to fussy with measurements so if some were a little out of place I didn’t really mind. You can’t tell with book rings anyway – well…unless you completely get it wrong and punch the middle or the envelope…but we are not that daft….are we?


Using the Crop-a-dile again I inserted the eyelets to make it look a bit more presentable and to keep the holes from tearing.


You can have envies of many sizes so long as you keep the holes in the same place.


Some of the envies I missed the measurements completely and they ended up a bit wonky but I managed to turn them into pocket-like envies : )


I also added premade envelopes that were the same pattern and sized and stuck them together to make a double sided envelope that you open up for extra surprises!


What it looks like undecorated…
And Here’s the fun part!
Then you decorate the crap out of them!


I used vintage ephemera, stickers, die-cuts, stamps, chipboard pieces, enamel dots, washi tape and loads of other embellishments. Just go mental! I LOVE the random ‘messy scrappy’ style. You don’t have to over think it.


To dress up the book rings I tied yarns and ribbons to them.


I tell you, I was so sad to give this away.


But I believe my partner liked it!
© Candy Rain Theme 2017
By Cherry Templates.
Candy Rain